When your friends and family ask, "What makes this taste so good?"...
You can proudly say, "It's My Rub!"
When your friends and family ask, "What makes this taste so good?"...
You can proudly say, "It's My Rub!"
Smoked Brisket Recipe Summary:
Content Links:
In-Depth Smoked Brisket Recipe:
I have probably smoked 40 or more briskets over the past seven years, some on an offset smoker and now, for nearly four years, on my XL BGE (Big Green Egg). The briskets that I do now usually turn out wonderfully well, but cooking the perfect brisket can be an elusive goal. I thought I would share my brisket techniques along with a few pics. Let me know what you think.
What I am Looking for in a Brisket:
Everybody seems to have their own idea of what barbecue is within their own region and I am no different. I am originally from Georgia, where barbecue was smoked Boston butt 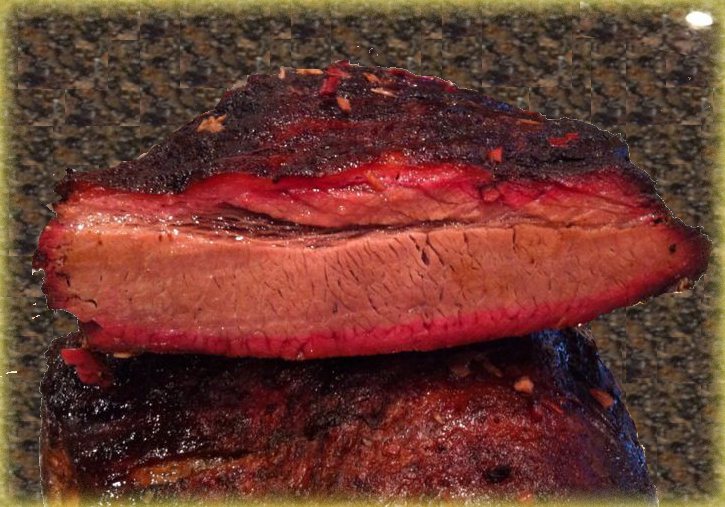 pork and served with tangy vinegar and mustard based sauces. When I moved to Texas in 1995, I had my first exposure to brisket and, honestly, I wasn’t impressed… I have come a long way since then and I have grown to love brisket. In addition, some places are actually serving pulled pork… in Texas! My wife, Kelley, is from Texas, and with her help, I have developed this appreciation for brisket and she has helped me to understand “good” brisket versus some of the stuff that had initially tainted my opinion of Texas barbecue. I have had brisket that was dry, tough, flavorless, cardboard tasting, over smoked, fatty, overcooked and just plain nasty tasting.
So, what am I looking for in a brisket? I look for a very moist piece of meat that holds together when cut. When pulled at both ends, it holds together, but stretches out somewhat like an accordion. The meat should have a nice flavorful bark, but not too salty. The bark should cover the outside with a noticeable pink smoke ring beneath the surface. The meat should have a beefy, seasoned, and slightly smoky flavor that is noticeable throughout the meat, not just on the edges. The meat should not be dry, taste like cardboard or fall all to pieces. It should taste very good!
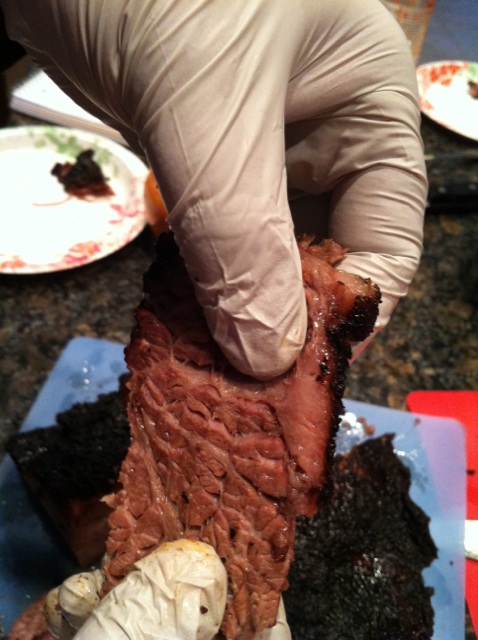
Accordion Brisket
The first brisket that I ever smoked was on an offset smoker and it turned out perfectly! I cooked this brisket at 250 degrees for about 11 hours, let it rest, wrapped in foil, inside a cooler for about 2 hours. My wife said it was the best brisket that she had ever tasted and I thought so too. We were so excited! I thought,” man that was easy…what’s the big deal?!!” I now know this was a fluke! Beginners luck! All briskets that followed failed in comparison. When I got my XL BGE I had such high hopes, but felt my brisket results were going downhill. I read forum entries, various barbecue books and was contemplating buying another offset smoker. Then, at last, I started having some positive results. In addition, Kelley, as a Christmas present, set us up a training session with a barbecue pit-master who came by our house and provided great information and insight into the do’s and don’ts of smoking brisket. Finally, the results were near perfection, IMO.
So the following are things that I have learned on this “Brisket highway” from some of you, trial and error, books and finally the pit-master.
Buying the Brisket:
If you want truly good brisket, buy a really good quality piece of meat. “Natural” or “Prime” are the best. (There is Wagyu beef, but outside of my budget). When smoking quality meat, fat renders evenly and nicely giving the meat a succulent moistness that lesser quality meats cannot give. “Natural” meat is grass fed until the last month or two of life and is then grain fed. Buy a packer cut natural brisket that has a nice “flat” and “point” from a quality market. Stay away from “Select” cuts of meat, look for “Choice” or better. In addition, if you want to have the best most tender brisket, buy your brisket at least two weeks ahead of when you plan to smoke it. If it is vacuumed sealed, leave it in its vacuum sealed bag in a refrigerator until you are ready to use it. This is called wet aging.
Wet Aging Beef
Wet aging is a technique that is used to tenderize and enhance the flavors in beef. It is simply leaving beef in a vacuum sealed bag for up to six weeks to allow the meat to tenderize naturally. As beef ages, it release enzymes that naturally break down the collagen and connective tissue that enhance the tenderness and flavor.
Naturally raised beef is usually more mature when it is processed and usually needs at least six weeks for it tenderize. I have read that one of the main reasons that supermarket meat is so tough is because it is not sufficiently aged. It is expensive to keep meat refrigerated for weeks before it is ready to sell, so most places don’t keep it long enough to properly age.
One thing that you will want to be sure of is that there are no leaks or holes in the cryovac seal and it should still be tight. If not, this can cause the meat to spoil rather than age properly. If your refrigerator starts to smell or the cryovac bag begins to expand, you have a broken seal and the meat is beginning to spoil.
Check the packaged date on the brisket to see when it was packaged. If the meat does not have the date on it when it was packaged, you should ask the butcher. The amount of time that you want it to wet age is up to six weeks from the time that it was packaged, not from the time that you purchased it.
If you buy a brisket or any beef that you want to wet age that is not in a vacuum seal, you can vacuum seal it yourself using a vacuum sealing machine. We have a FoodSaver brand that we use.
When you open the meat, you may notice a musty odor. This is normal. Simply wash the meat in cold water and pat it dry. The odor should disappear in less that an hour.
If you want to find out more about wet aging simply search for “Wet Aging Beef” on the internet.
Brisket Point and Brisket Flat
A brisket is made of two main muscles. The muscle that is thinner and usually runs the entire length of the brisket is called the “flat”. The point is a fattier muscle that forms a point on top of the flat. These two muscles have grains that run in complete opposite directions. When you buy barbecue and ask for lean meat, it is usually cut from the flat nearest the end away from the point. If you ask for juicy or moist brisket, it is usually cut from the point. When buying a brisket to smoke, look for a brisket that has a nice defined point and a flat that is pretty uniformly shaped in thickness and width. Some briskets have a flat that tapers to a very thin end and overcooks easily. Thicker and more uniform flats tend to cook more evenly.
When you get the meat home and you are ready to trim the fat, you want to keep a few things in mind:
We have had some success with brining and with injecting, but this is not necessary to get a quality tasting brisket. If you inject your brisket, be careful not to over “stab” the meat. A lot of injectors have huge “needles” that rip the meat and provide opening for juices to drain from the meat during cooking and defeats the purpose of injecting.
I have brined the meat overnight with success. The salt actually causes the meat to hold in the moisture during cooking, but during the brining process moisture is actually transferred out of the meat until homeostasis is obtained. This often causes the meat to look “washed out”. Also, we have used some other flavors and liquid smoke to give the meat a little more “smokiness” to the flavor. This is blasphemy to the purist, btw.
The brine is typically ½ cup of kosher salt to 1 gallon of water.
Rub
I always use “It’s My Rub!” Power Blend, but if cooking a thinner brisket flat, Smooth Blend works well. If using Smooth Blend, salt the meat with kosher salt before applying the rub. Either way, the salt in the rubs help control the moisture in your meat and is crucial when cooking low and slow. I think this is especially true for larger cuts of meat like brisket and pork butt. For ribs, I prefer to use much less salt and usually use “It’s My Rub!” Smooth Blend.
1 Cup of rub will typically totally cover a 12 to 15 pound trimmed brisket.
Put the rub on the meat and let it “dry brine” overnight or at least 6 and up to 48 hours.
Loading the Big Green Egg with Lump
I prefer oak lump charcoal and really like “Rockwood”, Ozark Oak Natural Lump or Royal Oak. Some lump has a nasty flavor that it imparts into the meat so you want to choose a clean burning lump.
I typically load my fire bowl up to the fire ring. You will want to use the Plate Setter (convEggtor) after starting the coals.
Setting up a Metal Grill to Cook using Indirect Heat
You can smoke a brisket on whatever device you have. If using a metal grill that does not have a heat deflector like the BGE’s Plate Setter, you will want to stack you coals on one side of the grill and cook the meat on the other side of the grill so that the meat is not above the coals. This is called indirect cooking. You will also want to align the lid so that the air vents are on the side of the meat to create a heat convection and to direct the smoke across the meat.
Chunks and Chips for Smoke
When loading my lump I use both hardwood chunks and hardwood chips. I prefer pecan or hickory chunks and place them evenly spaced about 6 inches from the middle of the fire ring on top of the lump. I then sprinkle apple wood chips over the surface of the coals. This provides constant smoke as the coals burn from the middle outwardly.
Soaking vs Not Soaking
I have never found an advantage to soaking the chips or chunks ahead. The coals typically burn from the center outwardly and by the time the fire reaches the majority of the chips, they have long dried out anyway.
Starting Your Cooker and Getting it to Temp
Starting a Big Green Egg for a low and slow cook is much different than offset smoker or metal grills. The BGE is very well insulated and maintains heat and temperature very well, where as a metal cooker loses heat and temperature very fast. Therefore, when starting a BGE for low and slow, light the coals in the middle and let the BGE come up to temperature slowly to a dome temperature of approximately 260 degree’s (grate temp about 250 degrees). I usually light my BGE about an hour before putting on the meat to get “clean smoke” and to stabilize the temp by adjusting the openings at the top and bottom of the BGE. If you start you BGE and the temp gets too high, it can be very difficult to get the temp back down and can waste a lot of time. Tend to your fire during this phase.
With metal cookers, you usually will get the fire hotter at first and place you meat on at a higher temperature, usually around 325 degrees because you will lose a lot of heat when putting your meat on the cooker.
Clean smoke refers to the smoke that comes off of the fire after the impurities have burned off and you get a nice and natural smell from the wood that you are using to create the smoke. When you first start a fire, you will get a lot of white/grey smoke that has an acrid smell. You want to wait until the acrid smell burns off before putting your brisket on to cook. You can also get acrid smoke from fat dripping down on your coals to avoid this, use a raised drip pan. A good test for clean smoke is to hold the palm of your hand over the smoke coming out of the cooker. Smell your hand and see if this is what you want your meat to taste like.
Plate Setter (convEggtor), Drip Pan, Grid and Water Bowl
On the Big Green Egg, you use the Plate Setter (convEggtor) to turn the BGE into a smoker/convection oven. In addition, when cooking a brisket you will want to use a drip pan to catch the brisket drippings. You need to elevate the drip pan off the plate setter to keep the drippings from creating acrid smoke. To do this, create three spacers by balling up aluminum foil into 1” balls. Place the aluminum balls on the plate setter followed by the drip pan on top of the aluminum balls. In other words, put the Plate Setter in the BGE and then place the aluminum balls on the plate setter in three places so as to support your drip pan. Then put the drip pan on top of the foil balls and then place your grate/grid in the BGE.
Place a small aluminum pan filled with water on the grate while cooking the brisket. This will help keep the meat moist and promotes a better smoke ring in your meat.
Brisket Setup
Get your temperature regulated on the BGE before adding your meat.
Placing the Brisket in the Smoker
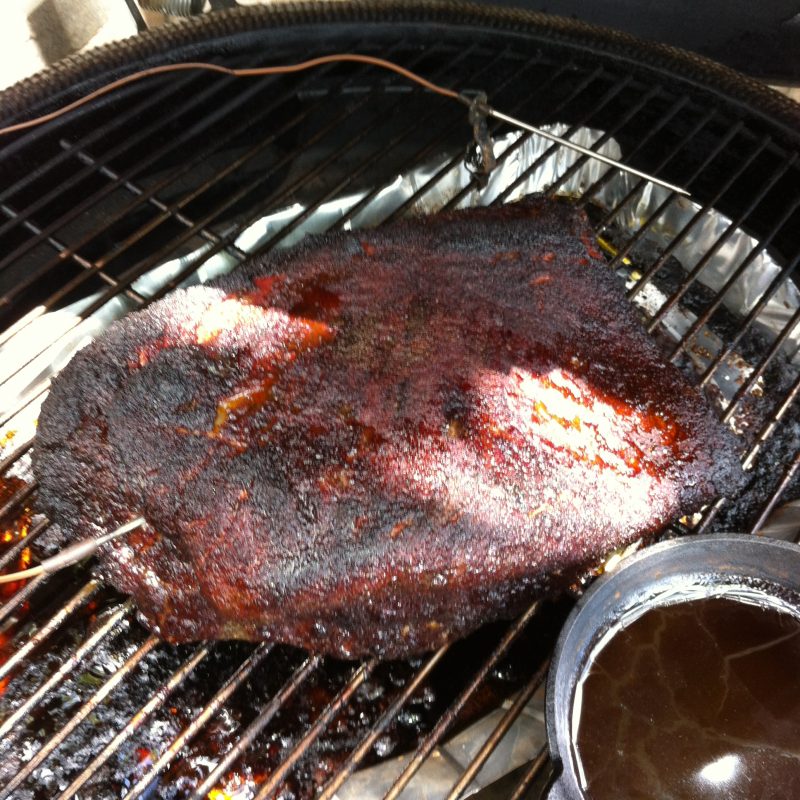
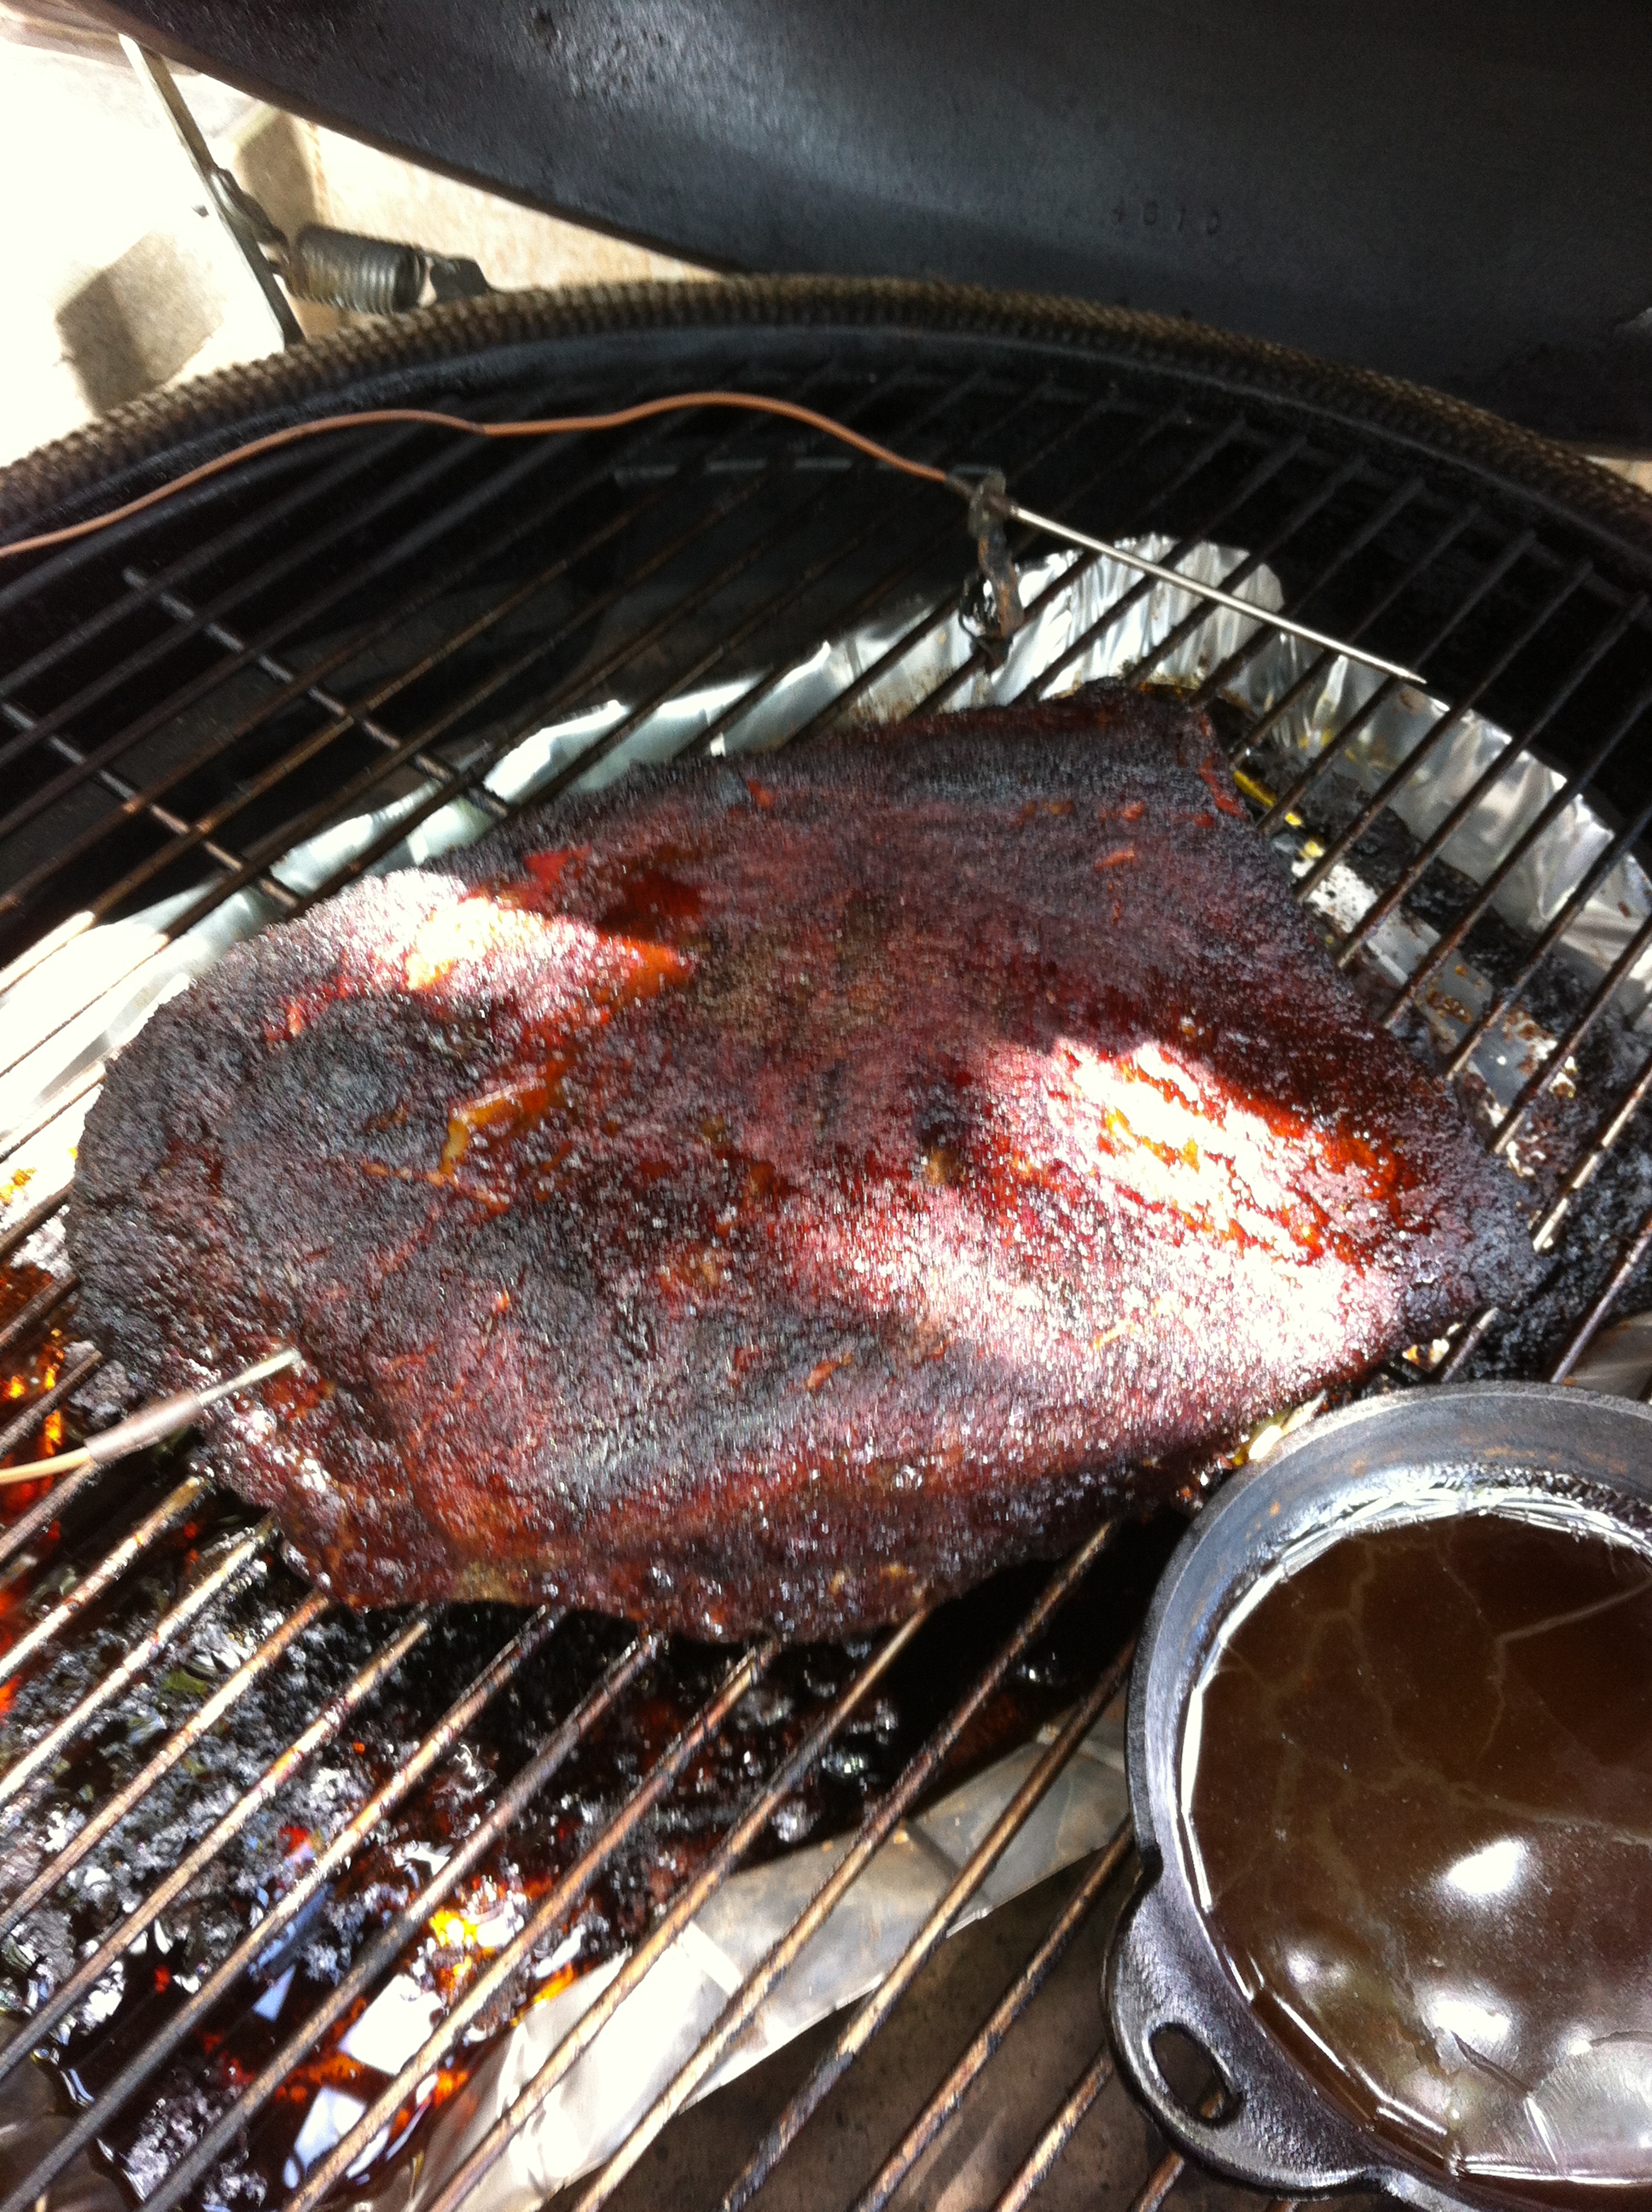
Place the brisket on the BGE in the middle of the grid over the drip pan. If you are using another type of smoker, place the meat where the smoke and air can flow evenly over the meat. Typically, you will want to place the thicker side toward the fire and the small flat away from the fire.
On the BGE I usually put the fat cap down because the heat sources is beneath the meat and the fat cap keeps the bottom from being over cooked. I also do this to maximize the smoke on the top where I want the bark to form.
On an offset smoker, I typically put the fat cap on top because the heat source is away from the meat and the bark can form on the bottom just as easily on either side. The thought is that the fat cap melts and helps to make the meat moister. I would probably do the same when using a grill that has been set up to smoke indirectly.
Once your meat is on the grid with a thermometer probe in the meat, Close the lid and LEAVE IT ALONE! DO NOT OPEN THE LID! Keeping a constant temperature in the cooker is key to making great brisket. You can add about 45 minutes to your cook time every time you raise the lid.
On the BGE, monitor the temp periodically over the next couple of hours to make sure that the temp is stable and then go to bed and just forget it for a while.
On offset smokers and other cookers, you will need to constantly monitor your temp and make adjustments to your fuel to keep a constant temp.
Wrapping vs Not Wrapping During the Cook
Personally, I prefer to wrap the meat in butcher paper about the 165 degree mark, but you don’t have to wrap the brisket at all, especially on a BGE. Butcher paper absorbs the fat and lets it drip through while protecting the meat and keeping in the moisture. The reason you want to “protect” the meat is that the brisket point and flat are different thicknesses and often the flat will be done much sooner than the point. Wrapping the brisket will usually protect the flat from becoming overcooked and will seal in some of the moisture. Aluminum foil and plastic wrap seal in the fat and create a steaming effect that can actually drive out the flavor that you are working to get into the meat.
Stall Phase
When cooking briskets and other meats, you may notice that the internal temperature of the meat will get to a certain temp around 165 degrees and will stall and not increase sometimes for hours. I have actually seen the internal temp get up to 170 degrees and then start to fall all the way down to 158 degrees without a change in the cooker’s temperature. This is called the stall phase and requires nothing from you except patience. That said, I usually wrap the meat when it reaches 165 degrees and I don’t even notice the stall anymore. I have read that wrapping can also prevent stalls, or at least accelerate the speed of the stall.
What is happening? My understanding of this is limited, but I have read that it is caused when moisture evaporates from the surface and the evaporation itself causes the meat to cool just the same way that perspiration helps to cool you on a hot day. Found here: http://amazingribs.com/tips_and_technique/the_stall.html
Done is not a temperature, but a texture and it usually occurs around 200 degrees internal temperature. To test for doneness, take some tongs and lift the brisket in the middle. If the brisket is stiff, it is not ready. However, if the brisket sags a little on each side of the tongs, it is done! Another test is to insert a temperature probe. If it goes in without any resistance, it is done. That said, I don’t like poking holes all in the meat, because it allows juices to escape which causes the meat to be dry.
If your brisket falls apart, it is over cooked. Also, every degree above 203 degrees is a loss in flavor. Flavor is in the fat and connective tissue. When the temperature goes too high, there is no way for the proteins to hold the flavor molecules and you might as well have cooked the brisket in an oven because you will have lost all the smoke and flavors that you worked so hard to get into the meat.
Resting the Meat
I usually rest the meat for at least an hour in a “cooler”. Take the brisket and wrap another piece of butcher paper around it with a small piece of foil on the bottom to catch the liquid. Put the brisket in a dry (no ice) “cooler” and place a towel on top. This will allow the brisket to cool very very slowly and will allow the juices to be reabsorbed back into the meat. You can safely hold a brisket with this method for up to 4 hours, while it remains at a safe temp, above 140 degrees.
Cutting and Slicing your Brisket
I prefer a non-typical technique when cutting a brisket. I cut the brisket in half where the brisket flat meets the brisket point and then cut the point in half (basically quartering the brisket). I then make slices from the inside cut of the point. You will be able to see clearly where the two muscles meet. Always serve the meat by cutting slices against the grain. I also suggest keeping some of the jus, mix it with low sodium beef broth and then spoon a little over the slices as you serve them.

Clear Flat and Point Grains
Burnt Ends
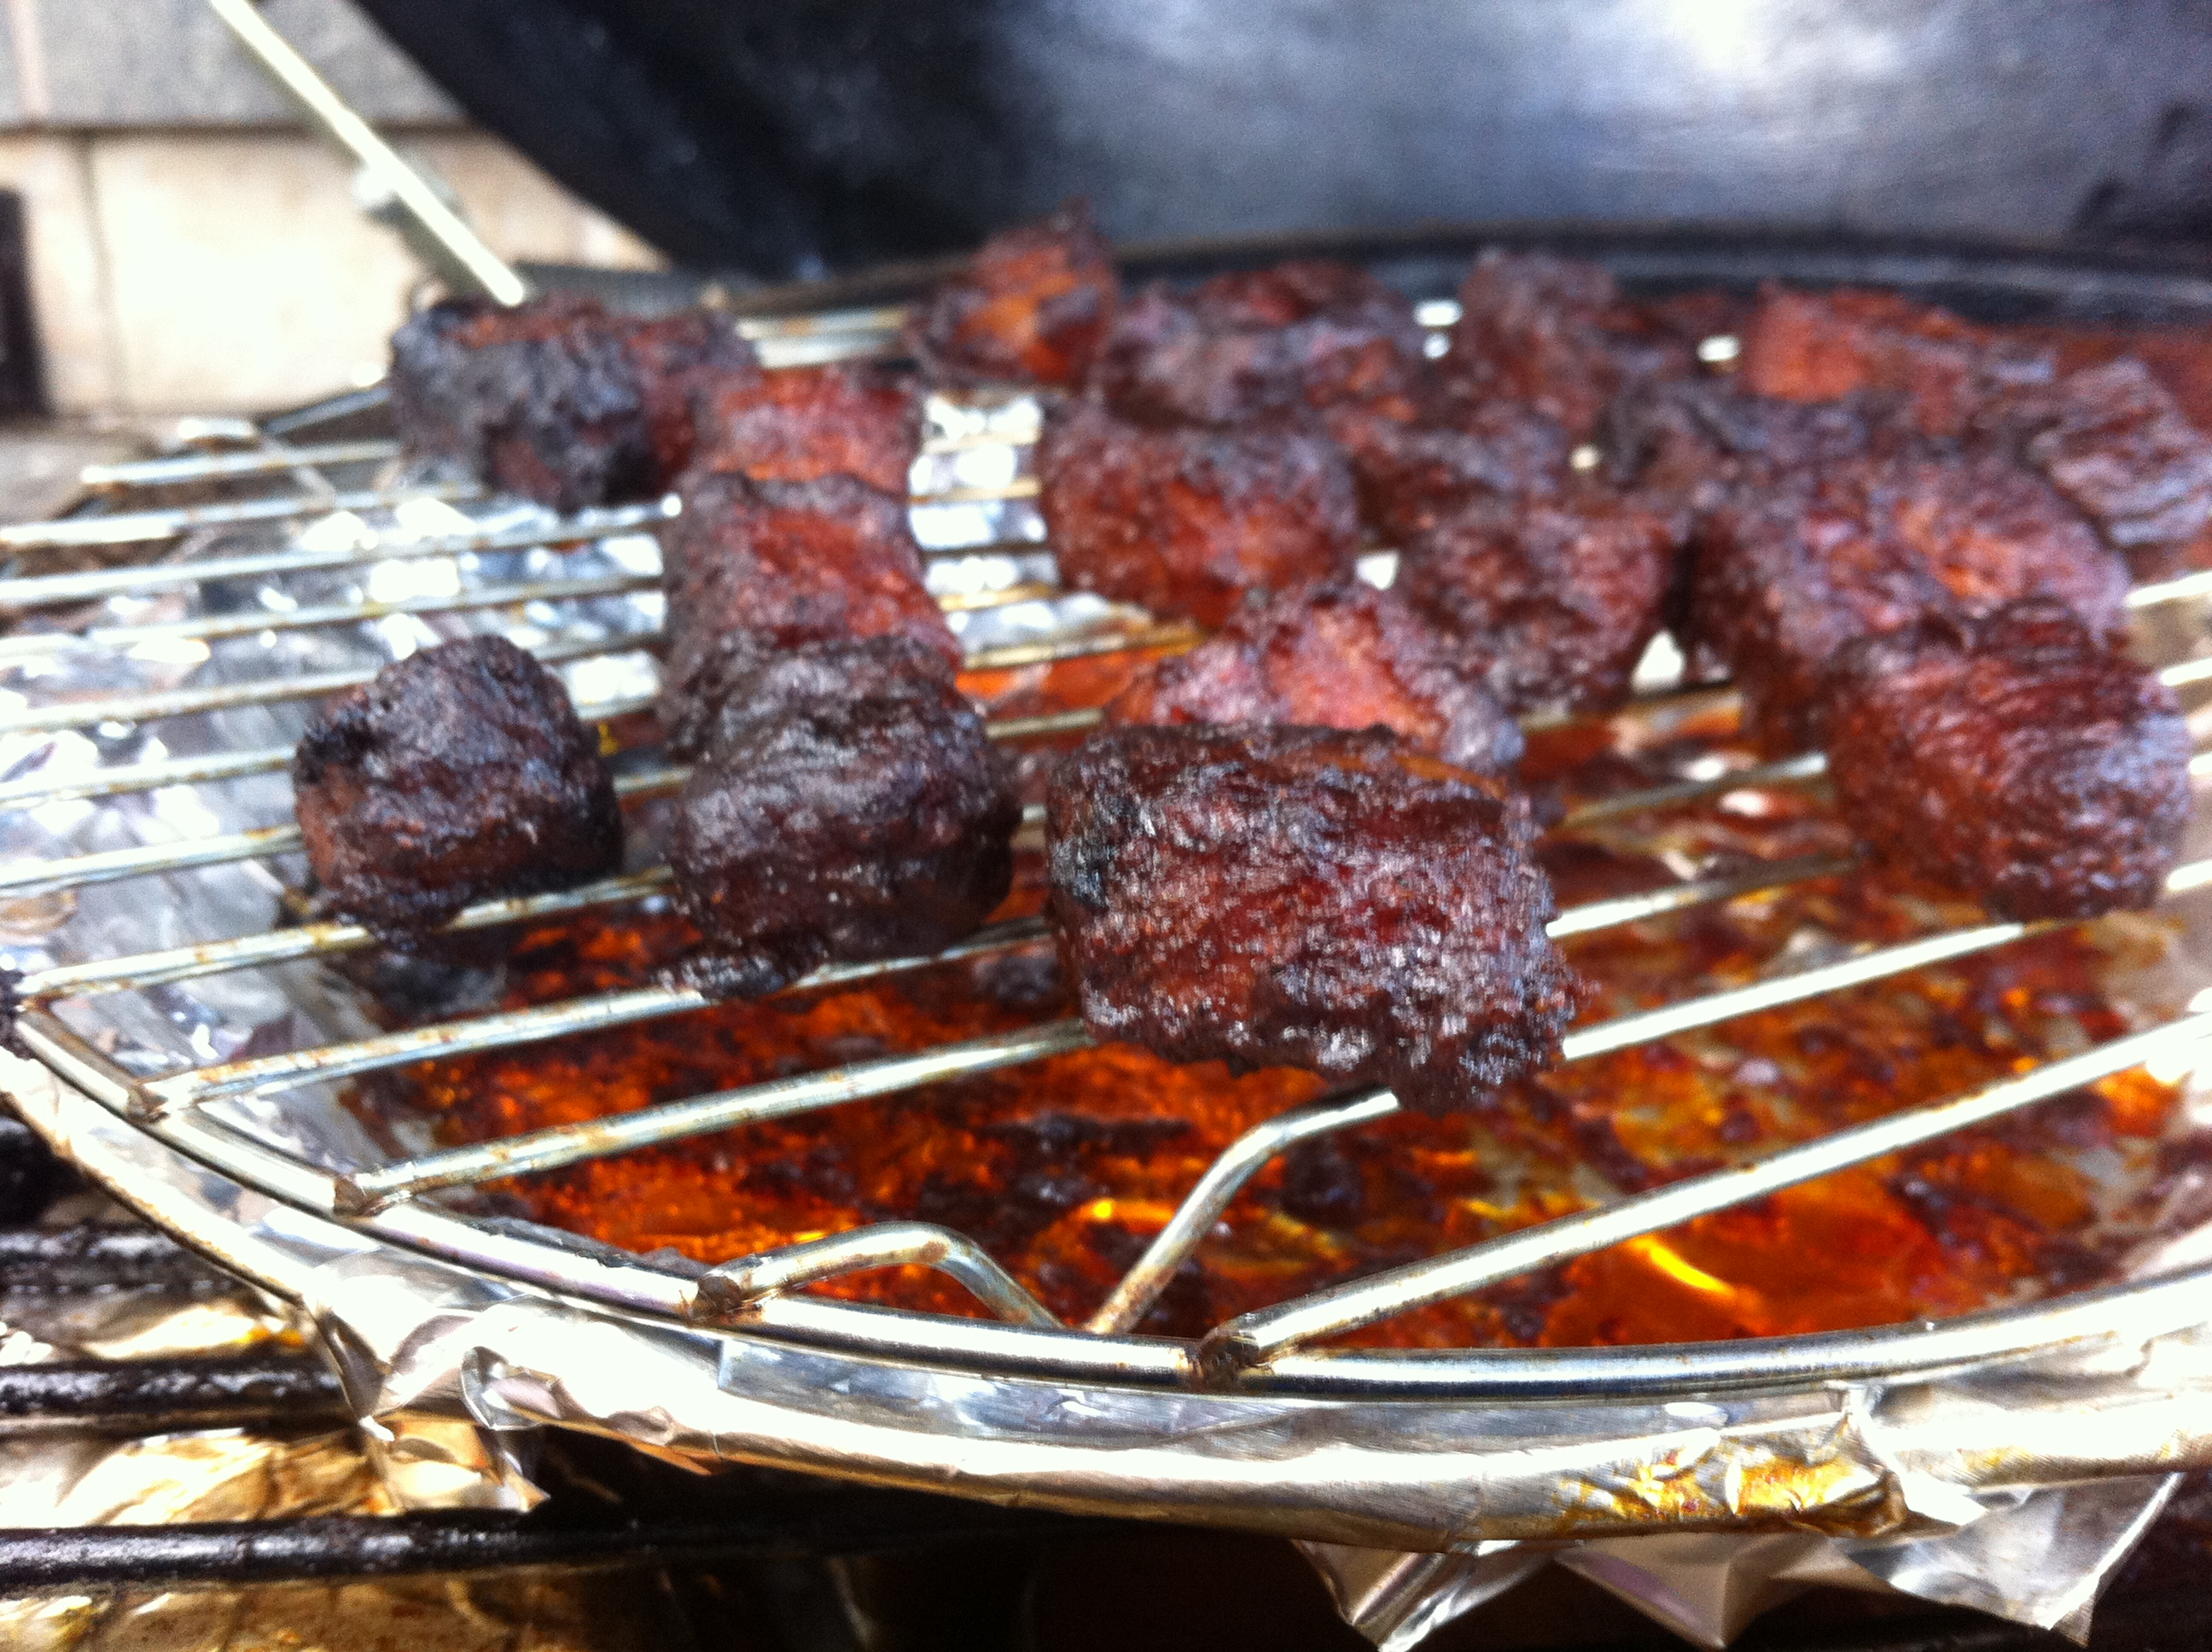
Burnt Ends
What are burnt ends? Some people think burnt ends are simply the ends that you cut off of the bark that are then served. These are good! However, true burnt ends are created by slicing up the point into small cubes. You then sauce these cubes (and I also sprinkle “It’s My Rub” Smooth Blend) and put them back on the smoker until they turn into heavenly
brisket candy. Usually a couple of more hours of cooking. Yummm!
I hope this helps with your next or first smoked brisket! And, when people ask, “what makes this taste so good?”…you can proudly say, “It’s My Rub!”
Thanks for reading!
Bruce and Kelley Underwood
Copyright 2014 Underwood’s It’s My Food!, LLC
[comment]
907 Farm Path, Brenham, TX 77833| Email:
bruce.underwood@itsmyrub.com | Phone: 512-635-6052
Copyright 2021, Underwood's "It's My Food!", LLC. All Rights Reserved.
